One hell of a year…and possibly returning to blogging?

It has been one hell of a year… I think for everyone. Oi.

My blog has sat here dead for so long and I am thinking about resurrecting it. With so much going on I think it would be a great outlet. I used to blog regularly yeaaaars ago (mostly on a different domain altogether) and then life got in the way.

Things haven’t slowed down by any means – if anything things have gotten nuttier now that I have 4 girls (10, 8, 5 and 2) with one on the way! Add in the pandemic, remote schooling, running my own business(es) from home while also maintaining the house and trying to be a good wifey…. BUT I am thinking having a place to share the crazies/vents of the day would be great.. So maybe, just maybe… I will be updating again regularly. (Or it could go dead again for another 5 years /shrug/ )

I am thinking if I do I am going to do it without the pressure of needing to publish uber pinterest worthy content and not force myself into some kind of schedule or timeline… it takes the fun out of it. Sometimes I may just want to post about day to day nonsense.

For instance – my 2 year old was born a raging lunatic. I do not know what it is but I swear each child I have seems to be rougher than the last. (So I should probably be pretty afraid expecting baby #5 in August 2021.) She is extremely stubborn with a temper and just makes me want to lock myself in the bathroom with snacks for a good cry almost daily. She won’t let Ry or I change her 95% of the time without a violent battle. It is often a two person job and it is insanity. Her new fun thing is grabbing her ass cheeks mid change so I have to switch between wiping her butt and her hands. Today was one of those days and I had the joy of the plastic bag holding her dipes and nasty wipes having a hole that I didn’t notice was there until yucky dipes and wipes began tumbling out mid poop change. All while fighting to get her hands and bum clean. Yuck. Double triple yuck. All day is moments like this sandwiched between adorable moments. But momma is tired… and I think returning to blog will be a fun escape. Maybe though. We shall see. I tend to be blog flaky. 😀
Wishful Wednesday – My Ultimate Travel Wish: Ireland – 37 Places to Visit and See & Things to Do in Ireland

Until I met hubby I had never left Western NY except to travel across the border 20-30 minutes to Niagara Falls Canada. I can still remember my excitement as I drove over the Pennsylvania state line for the first time in a short trip in search of sparklers and bottle rockets around the 4th of July. I was in my 20’s and actually teared up a little… (Dorky, I know.) I was so excited to see something new and be in a state other than NY, even if it was only for an hour or two. Since then hubby and I have gone to the Thousand Islands in NY, North Carolina (a handful of times – Beautiful Wilmington and Oceanside Topsail Island, Carolina Beach and Nags Head – Love, Love, LOVE), Washington DC/Alexandria VA, and the state of Washington (Seattle, San Juan Island, Forks – words cannot express the beauty).

I feel so blessed to have been able to see the places I have been. The only problem is I yearn to explore and see more! Which brings me to my wish for this Wednesday – to visit and vacation in Ireland!

My great grandparents on my mother’s side are from Ireland (Kilkenny to be exact) and my Grandma Lily always wanted to visit. There is just something that seems tZZZZZZZo pure and magical about Ireland. I would love to someday see the country first hand!

If I am ever lucky enough to visit here are some places I would love to see and things I would love to do while there!

1 – Slieve League Cliffs

#donegal #slieveleaguecliffs #slieveleague #instadonegal

A photo posted by Shirley Carson (@shirley.carson) on

2 – Classiebawn Castle

3 – Swim Forty Foot

4- Killarney

5 – Lough Gur / Ballyhoura

6 – Kylemore Abbey

7 – Dingle Peninsula

8 – Giant’s Causeway

9 – Ballynoe Stone Circle

10 – Blarney Castle

11 – Dublin

12 – Eas a’ Ranca Waterfall at Ardara

13 – The Dark Hedges Co. Antrim, Bregagh Road5

[Read more…]

Where oh where did I go?

Well I got the site up and going and then disappeared! Long story short – life got in the way.

A year and a half later and I now am the proud mom of -3- beautiful little girls – Lelia Noelle, Aerilyn Grace and newbie Elora Violet. Elora was born April 19th and just turned 5 months old. Finally getting into a schedule now as a work at home mom of 3 and hoping I will have the ability to update here more often than once per calendar year. My girls and home business keep me super busy but sometimes a momma needs somewhere to talk about her day, vent, share new ideas and recipes..and this is my place for that! Crossing my fingers I can stop neglecting this little place I carved out for myself on the interwebs.

This is just a short update! I have a lot to blog about since it has been so long. Including a diastasis recti update! (Since having 3 girls it is now worse/bigger BUT I invested in a new program a couple months ago and hope to see results. Details to come!)

Thanks for sticking with me – I am excited to (hopefully) be (mostly) back! 😀

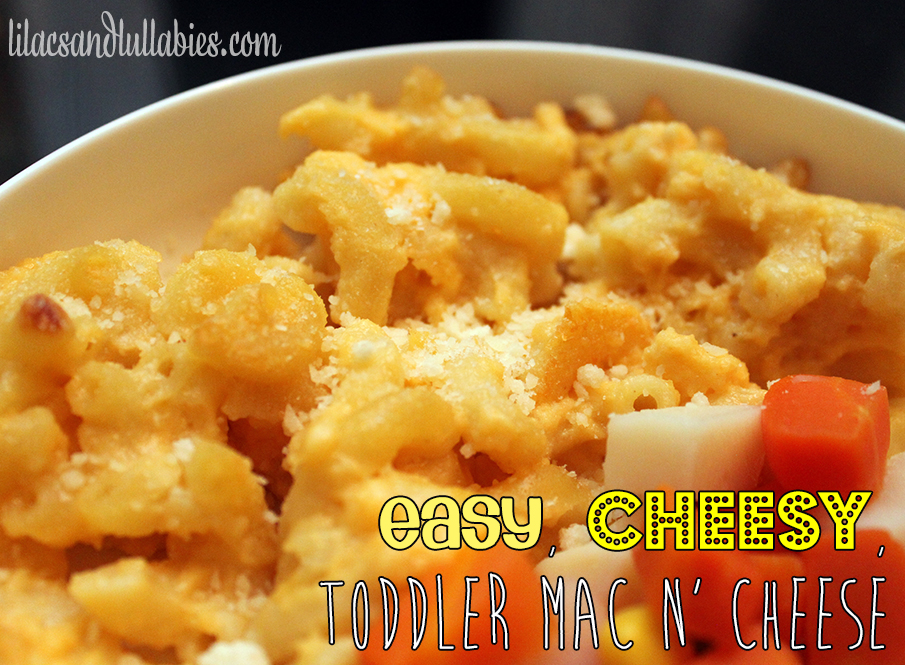
Easy Cheesy Toddler Mac and Cheese Recipe – (Shhh…Adults will love it too!)

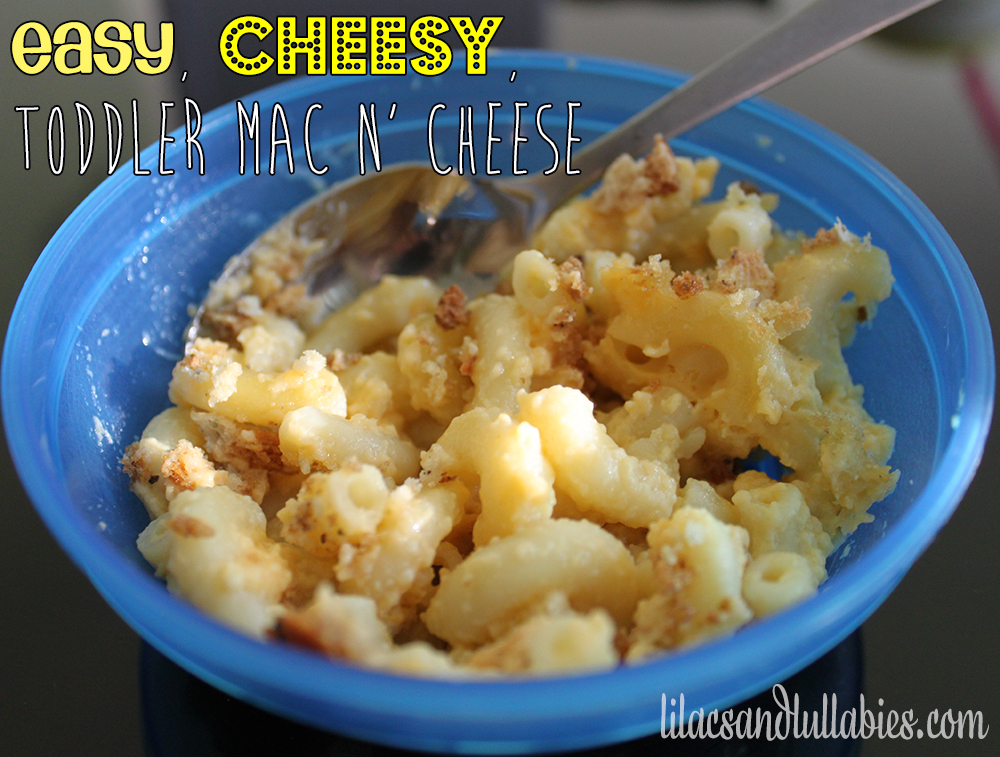
Easy Cheesy Toddler Mac n Cheese -  Super simple and delicious Macaroni & Cheese that parents will love too! www.lilacsandlullabies.com

With a one and a three year old finding a quick easy dinner that both of them will gobble down is always a task for me as a mom. My 3 year old, Lelia, is usually a pretty good eater but my 16 month old, Aerilyn insists on feeding herself so ideally the food I make is something she can pick up and feed herself (without utensils because we are not there yet!) That’s where my Easy, Cheesy Toddler Mac and Cheese recipe comes in and saves the day/night! 🙂

It is easy for my youngest to grab it up with her fingers and shovel it in and filled with cheese (which both of my girls are huge fans of!) It is also super easy to throw together. I’ve been making this for my little boogers for about  7-8 months now and it is always a huge hit. Plus with different mix ins and substitutes you have the option of making it a little bit healthier or changing it up a little bit. That’s why this is one of my favorite go-tos and I wanted to share it with you guys! (This makes a pretty big batch so feel free to halve the recipe if you don’t need as much. Hubby and I tend to eat it alongside the girls for dinner as well so I like to make it in the larger amount so I have a little leftover to use again a little later in the week when things are hectic!)

Easy Cheesy Toddler Mac n Cheese Closeup -  Super simple and delicious Macaroni & Cheese that parents will love too! www.lilacsandlullabies.com

Easy Cheesy Toddler Mac N’ Cheese

  • 16 oz. Box of Elbow Macaroni (Make it whole wheat if you want to make it a little healthier!)
  • 4 TBSP. Butter (I tend to use Smart Balance since it is what I usually have on hand.)
  • 4 TBSP. Flour
  • 3 Cups of Milk (I use whatever is on hand be it Skim, 1% or Whole. If I use skim I usually do about 1/3 whole milk and 2/3 skim so there is a little bit of fat for taste but it really is a matter of preference!)
  • 2 Eggs
  • 3 Cups of Shredded Cheddar Cheese
  • 10 American Cheese Slices
  • Salt & Pepper
  • Optional: Parmesan Cheese & Bread Crumbs for topping (I love crunchy Panko!)
  1. Preheat oven to 425 degrees and spray a 9×13 casserole pan with non-stick spray (or grease with a little butter).
  2. Boil your macaroni until al dente. Drain and set aside.
  3. In a small sauce pan melt your butter and then whisk in the flour til it forms a roux. (I usually have awful luck actually making anything except thick buttery flour after this step but the milk added in the next step smooths it out and you wouldn’t know the difference.)
  4. Add your milk and whisk it up to mix. Bring to a simmer, allowing it to thicken. Add salt and pepper.
  5. When the milk mixture has thickened up a little remove it from the heat and add in your cheese (Shredded Cheddar and American Cheese Slices), stirring to melt. (If you aren’t using deli cheese it helps to remove the packaging off the cheese slices, stack them and then cut into strips/cubes before throwing them in to speed up the melting! I do this when I am using Kraft or Wegmans Cheese Single Slices)
  6. In a separate bowl gently whisk up your two eggs. Whisk in a little bit of your warm cheesy sauce mixture to “temper” your eggs. This pretty much gets your eggs a little used to the heat of the sauce before adding them so when you add them to the sauce they don’t immediately cook and get clumpy. Once they are whisked with a little bit of the sauce whisk it gently into the cheese mixture.
  7. Pour the cheese mixture over your cooked macaroni until well coated.
  8. Pour the mac mixture into your prepared baking dish and top with parmesan cheese and brand crumbs.
  9. Bake for 20 minutes until bubbling. Yum!

Super easy and I promise you it is super delicious! I think it is the best mac and cheese I have made from scratch to date so if you are a mac and cheese lover yourself I think you are going to LOVE this too…(That’s why you need to make a big batch!) Om nom nom.

I will leave you with a photo of my youngest, Aerilyn, enjoying her Toddler Macaroni and Cheese when she was 10 months old. (Aww…my little boogsy..where does time go?!?)

Aerilyn Enjoying Easy Cheese Toddler Mac

Some humor in the day to day life of being a mom…

Before you have children most of your experience is the occasional sitting job or over night for nieces or nephews. Everything seems to be rainbows and unicorns (with the occasional poop). Than you have kids of your own (especially when you have more than one!) and things pretty much become chaos. (Had to stop blogging just now after just a couple sentences because the girls just headbutted eachother fighting over a comforter and burst into a chorus of crying. Craziness. Every minute. Every day!)

I came across a video from youtube user JaeTracie and had to share because it made me laugh after a long day with work and the girls and thought all of you moms could relate and would love it as well.

I love how she mixed the chaos and craziness we experience as moms with the adorable precious moments we also have the pleasure of having with our kiddos. I know I am guilty of the “No yelling in the house!” and “Why am I sooo tired..” (plus about 90% of the rest of the video clip). What are you guilty of??

Life as a mom (or dad!) is definitely one of the hardest, craziest, most chaotic jobs on this planet. Luckily it is also one of the most rewarding jobs as well. I am so blessed with my little family. I am sure you feel the same! (Most days..heehee!)


DIY Laundry Detergent – Clean, Yummy Smelling Clothes (Plus it saves money too!)

DIY Laundry Detergent Safe for Regular and HE Washers! Leaves clothes, clean, fresh and saves you money!

Last winter I stumbled upon a few recipes online for making your own laundry detergent. I had been using a powder version of Arm & Hammer with Oxiclean that I absolutely -loved- but when that suddenly became impossible to find (unless I wanted to spend a fortune on amazon) I decided I would give the diy laundry detergent recipe a try. The results? Awesomesauce. While it was a little time consuming to make (mostly grating down the bars of soap) it is totally worth it. You only need to use a couple tablespoons for each load so it lasts FOREVER and my clothes come out just as clean (if not more clean!) as before and the smell fantastic too. Plus, I love how you can customize it by adding your choice of scented washer crystals (or leave them out if you would rather avoid scents!). I always use the Purex Fresh Spring Waters scent and my mom is constantly telling me how wonderful my blankets and linens smell.

To date I have only made 2 batches of it since my first batch lasted around 6-8 months (which says a lot as a family of 4 with a toddler and an infant!). The second time around I tried another method of grating the bars of soap and I am not sure if I will try it again but I’ll get to that later on!

DIY Laundry Detergent Safe for Regular and HE Washers! Leaves clothes, clean, fresh and saves you money!

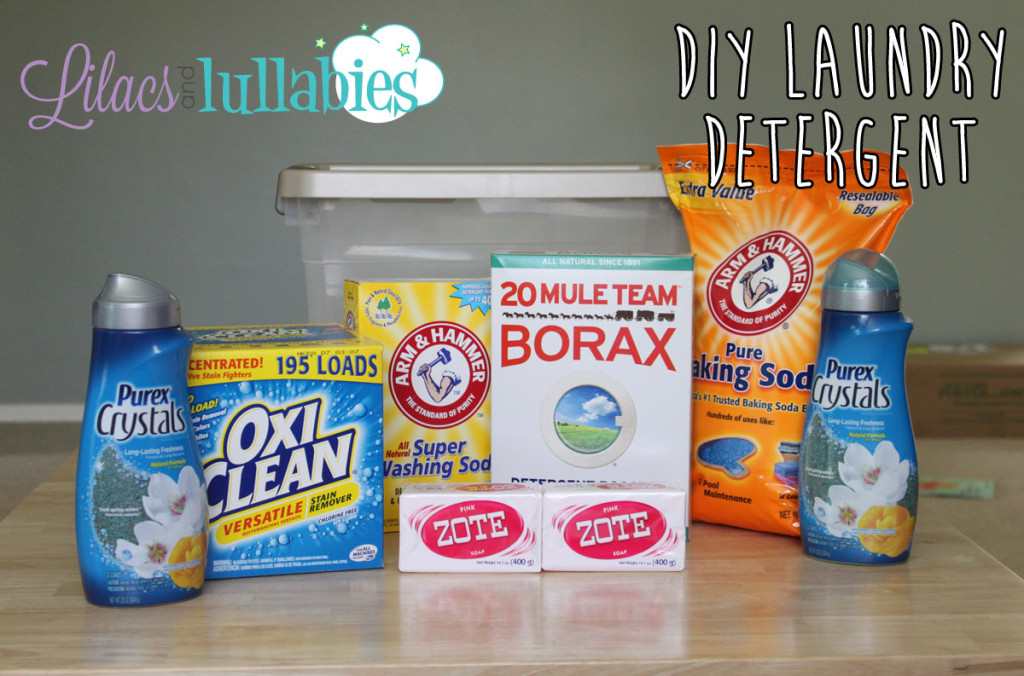
You will need:

  • Large bin or pail for mixing/stirring your laundry mixture
  • 2 – 14.1 oz Bars of Zote Soap (Laundry/Detergent Aisle – Fels Naptha will also work! The pink Zote has a smell so avoid if you wanted it to be unscented. Zoe tends to be $0.98 a bar locally!)
  • 1 – 4 lb. 12 oz. Box of Borax (Laundry/Detergent Aisle)
  • 1 3 lb. 7 oz. Box of Arm & Hammer Super Washing Soda (Laundry/Detergent Aisle)
  • 1 4 lb. (or 2 – 2 lb.) Box(es) of Arm & Hammer Baking Soda (Baking/Cooking Aisle – I buy a big bulk bag from BJ’s or Sam’s Club and measure it with my postal scale to save even more $$$)
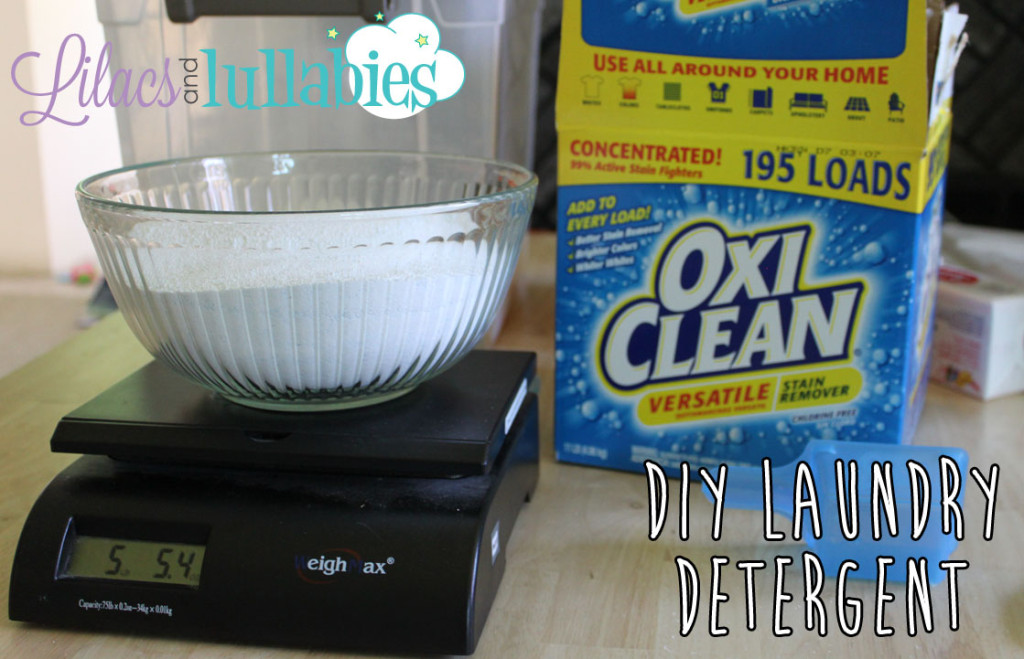
  • 3lb Container of Oxiclean (Laundry/Detergent Aisle – Or buy in bulk – I buy a big bulk box from BJ’s or Sam’s Club and measure it with my postal scale to save even more money!)
  • 2 55 oz. Bottles of Purex Crystals (Laundry/Detergent Aisle – I use Purex Fresh Spring Waters. Optional – Leave out if you would rather do without the smell.)

Now let’s make some soap!

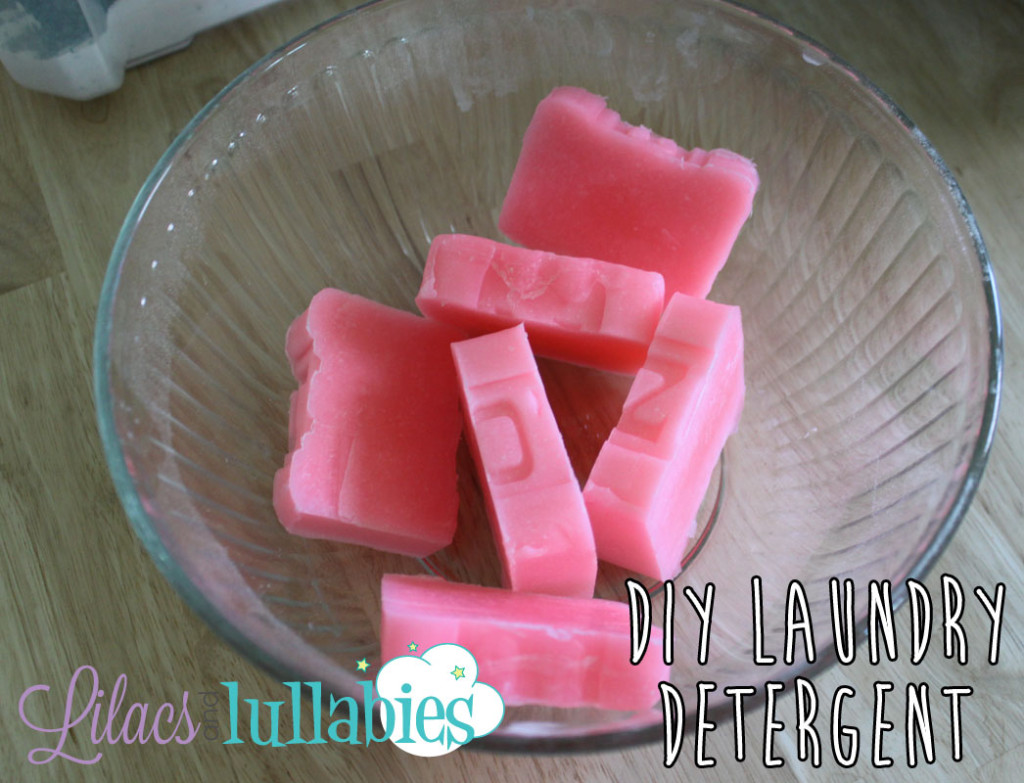
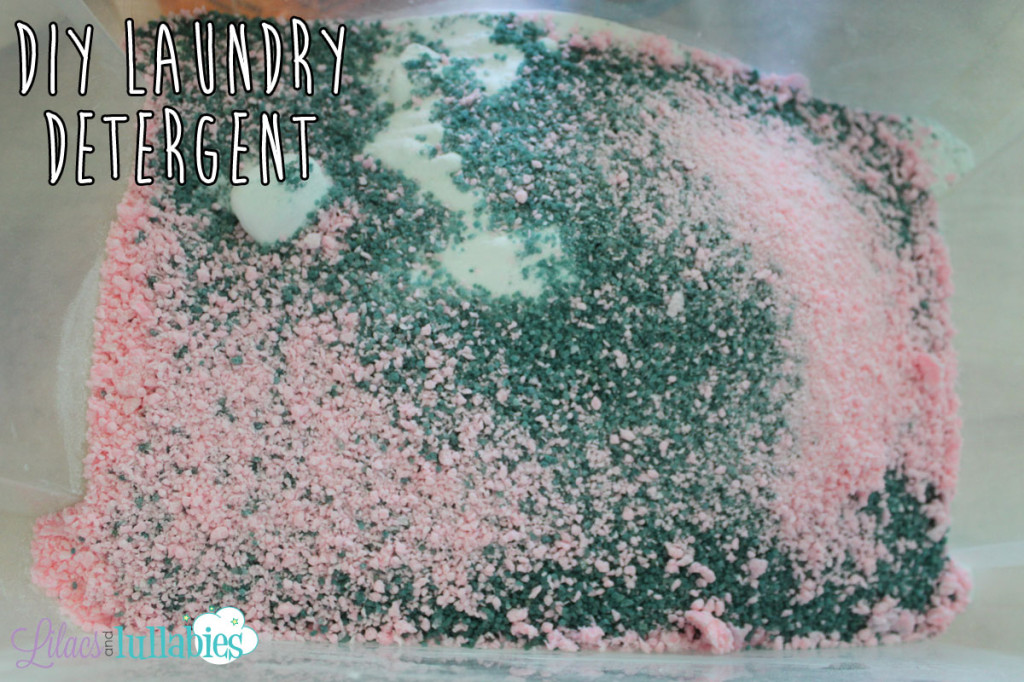
The first step (and most painstaking part of the process) is to get your Zote Soap grated down OR in powder form. There are two ways of doing this! The first option is using your run of the mill cheese grater and grate the bar of soap on the finest side until it is completely grated. I did this the first time around and it worked fantastic but it took awhile and left me with a little bit of a sore arm/wrist.

DIY Laundry Detergent Safe for Regular and HE Washers! Leaves clothes, clean, fresh and saves you money!

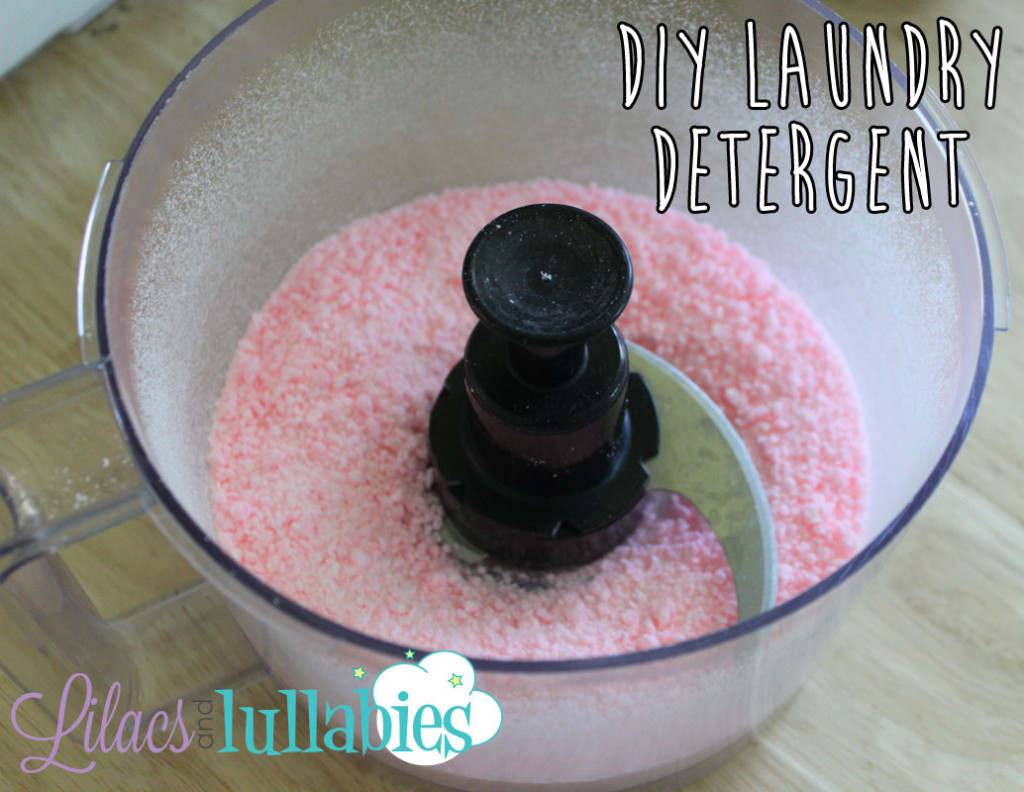
The other option is cutting up your bars of soap into slices with a really sharp knife and popping it in the microwave for a few minutes til it puffs up. You then take your cloud of Zote soap out and let it cool down. When it is dry and cooled it crumbles easily into little bits (and becomes a really nice fine powder if you toss it into your food processor to finish it up!)

I did it this way the second time around thinking it would beat grating by hand and it wasn’t as easy as it sounded but I think it is because I have an older microwave. I read if you leave it in too long it can burn but my microwave hadn’t even -nearly- turned it fully into a pink cloud at the end of a few minutes. I ended up having to zap it for 4-5 minutes, remove it and scoop the top fluff off onto another plate to cool and stick the thick dark pink blob of somewhat melted soap back in again for another 4-5 minutes…and repeat…and repeat. I was worried if I left the fluffy part in too long it would burn before the rest of the bar was able to melt and puff. Towards the end I got a little more daring and would leave the soap in a bit longer (5-8 minutes) and was having better luck.

My advice is if you take this route be prepared to babysit the soap the first time around as it goes through the microwave. Your microwave might do it in 1-4 minutes like others or it may be like mine and take much, much, longer to get the job done (and leave you with a Zotey smelling microwave whenever you nuke up some food for about a month. Ick.) Which way will I do it when I make the detergent a 3rd time? I haven’t decided. Honestly with how my microwave handled creating the puffy soap cloud it ended up being more time consuming and annoying than hand grating BUT I very much preferred the really fine powder it crumbled into using my food processor than the shredded soap. The powder version just incorporated itself into the mix better since it was so much finer.

DIY Laundry Detergent Safe for Regular and HE Washers! Leaves clothes, clean, fresh and saves you money!

DIY Laundry Detergent Safe for Regular and HE Washers! Leaves clothes, clean, fresh and saves you money!

When you have your Zote all shredded or powdered up you are almost done! (The worst is over!) Pour the remaining ingredients into the bin/pail with your Zote Soap (Borax, Washing Soda, Baking Soda, Oxiclean, Purex Crystals) and stir, stir, stir! (As mentioned in the ingredients to save a little more money I tend to buy the baking soda and the Oxiclean in bulk and then use my postal scale to measure the correct amounts out before adding it to the mixture. This leaves me leftover stuff to make future batches!)

DIY Laundry Detergent Safe for Regular and HE Washers! Leaves clothes, clean, fresh and saves you money!

DIY Laundry Detergent Safe for Regular and HE Washers! Leaves clothes, clean, fresh and saves you money!

DIY Laundry Detergent Safe for Regular and HE Washers! Leaves clothes, clean, fresh and saves you money!

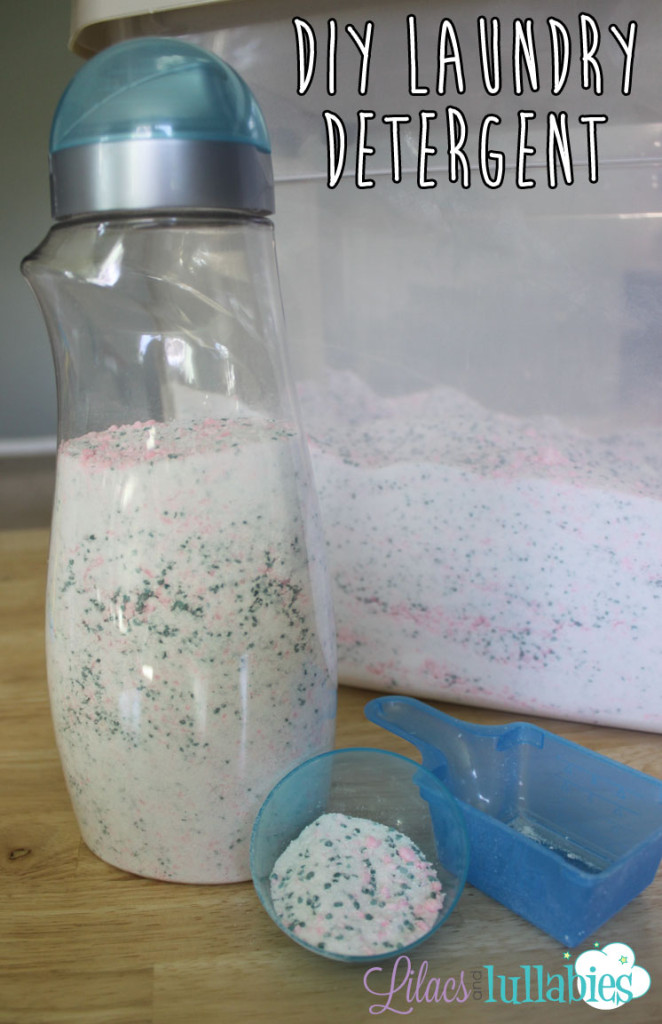
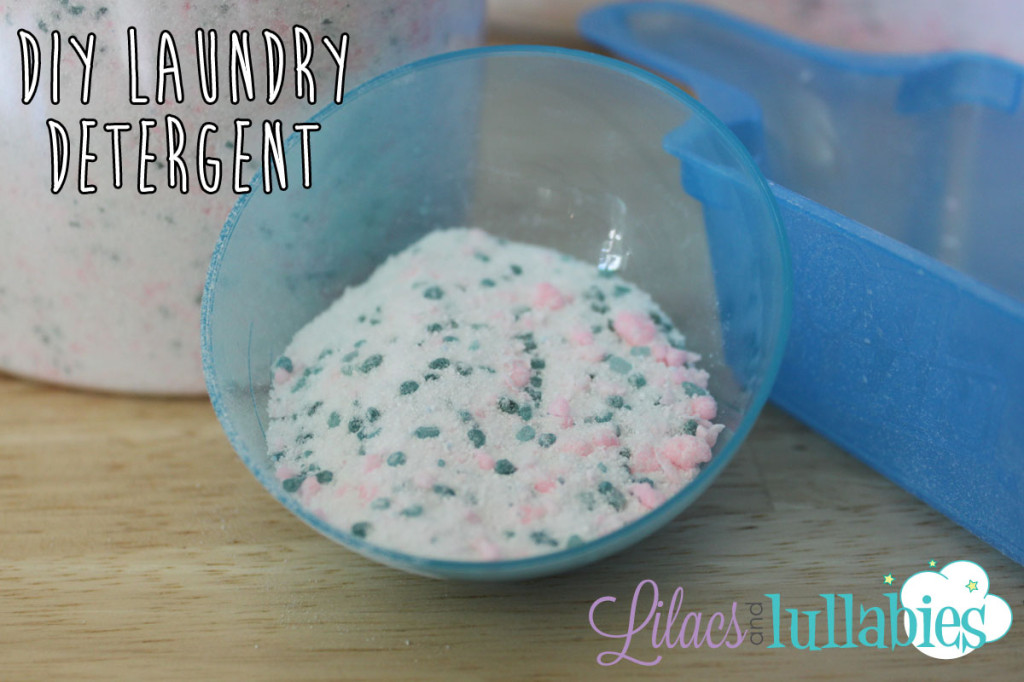
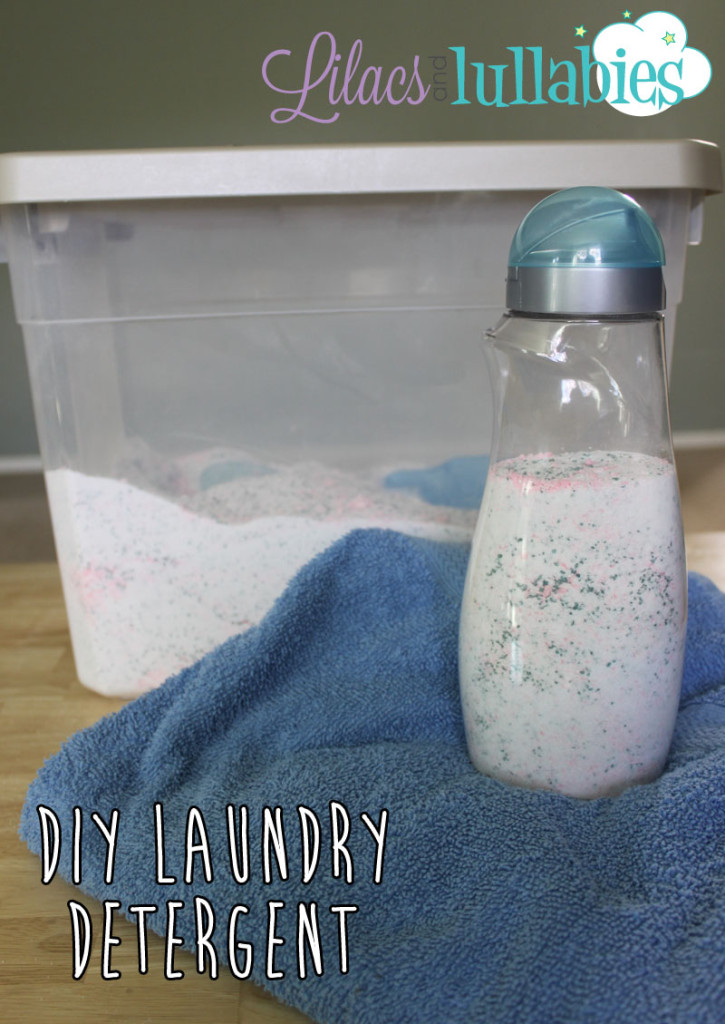
That is it! Place it in a container of your choice that keeps out as much moisture and air as possible. You can pour/scoop some into your empty Purex containers and reuse them to dispense the powder as well. (I fill up the bottles and use the little round tops to measure out my powder as seen in photo.)

DIY Laundry Detergent Safe for Regular and HE Washers! Leaves clothes, clean, fresh and saves you money!

Now all you need to do is use one-two tablespoons for each load and your clothes will be clean and yummy smelling like mine (and your wallet will thank you!) I tend to use a little more than 2 tablespoons per load since I tend to do big loads all at once and enjoy the extra pretty smell. Try different amounts to see what works best for you!

Some Additional Info and Tips:

  • There is a tendency for the completed powder to get hard over time as it sets. You can throw in some packets of silica gel or a cheesecloth/pantyhose full of rice to help absorb the moisture that is causing this! Otherwise give it a good mushing and smashing with something heavy and it breaks right back down into powder form. (I have used my hubby’s socket wrench since it was laying near by and heavy – BAM BAM – ka-POWDER!)
  • I use the powder in a front loading HE washing machine and haven’t had any issues to date. I have tried it both directly in the washer on top of the clothes and in the detergent drawer and both seemed to work fine.
  • I have pretty sensitive skin and use this powder to not only wash my clothes but also both of my daughters clothing and haven’t had any irritation to date.
  • I wash in cold water and it dissolves just fine and clothes come out clean and fresh.
  • I have heard of others using other bar soaps like Dove Soap without any issues. As long as it is around the same amount of soap I don’t see why not! Experiment and let me know how it goes!
  • I have also read where others shred the soap and then bake it in the oven at 170 degrees for about 45 minutes and get the same crumbly, powdery affect. Some also say to leave the bar soap out for a few days unwrapped so it dries out before grating. I may try these next time and will update how it goes!
  • Cost tends to vary by location but it seems to be about $20-$30 per batch and it lasts AGES!

Have you made your own laundry soap? Is the recipe similar? Any tips or tricks I haven’t mentioned? Would love to hear! Especially if you make your first batch after reading my blog. Believe me – try it and you will never go back to using the more expensive alternatives!

DIY Laundry Detergent Safe for Regular and HE Washers! Leaves clothes, clean, fresh and saves you money!

Egg and Cheese Mini Muffins – Breakfast With My Girls

Egg and Cheese Mini Muffins Perfect for Toddler or Infant Breakfast Finger Foods

When I have some free time I can’t help but do a little pinterest browsing and one of my favorite things to pin are edibles to make for my girls. While pinning recently I came across a recipe for egg and cheese mini muffins from The Seasoned Mom and decided to give it a try. I’m so glad I did because it was a HUGE hit with both of them and it was super quick and easy. If you have a toddler or an infant starting to eat finger foods and need toddler or infant meal ideas these egg and cheese mini muffins would be perfect for your breakfast rotation!

You will need –

  • 6 Eggs
  • 3 TBSP. Milk (I used 1% – It’s what we had!)
  • 1/2 tsp. Salt
  • 1/8 tsp. Pepper
  • 1/3 cup grated cheddar cheese
  • One slice of American Cheese (My little add-on/tweak!)

Let’s get cooking!

  • Preheat your oven to 350 degrees and prepare your mini muffin pan with some non – stick spray. If you don’t have a mini muffin pan you can use a regular muffin/cupcake pan too, they will just be bigger!
  • In a large bowl or measuring cup whisk together your eggs, milk, salt and pepper. (I started in a bowl and transferred to a measuring cup for pouring once Lelia finished whisking. Lelia loved helping with this part – stir, stir, stir!)
  • Pour egg mixture into your prepared pan filling cups about 2/3 full.
  • I then took a slice of american cheese and cut it up into small pieces. (I had about 19 filled mini cups so I sliced down 4 times and across 3 times to get 20 tiny pieces). Drop a small piece of american cheese into each cup filled with egg mixture.
  • Sprinkle cheddar cheese evenly on top of your egg filled mini muffin cups. Bake 8-10 minutes or until eggs have set. (Increase cooking time if baking in regular size muffin tins!
  • Allow the egg muffins to cool in the pan a few minutes before transferring to a wire cooling rack.
  • If you are eating the muffins immediately allow to cool until they aren’t too hot for little mouths to eat and serve! If you are freezing allow to cool completely, spread on a baking sheet and freeze and then dump them into a freezer bag for easy access for a delicious breakfast for you or your babies! When heating from frozen just stick them in the microwave for 15-30 seconds or until heated through.

I can’t say enough how easy these little egg muffins were and they were so delicious! Lelia asked for seconds (and thirds!) and little Aerilyn gobbled them right up too. I ate a bunch myself and knew the recipe was a keeper. I especially loved my little add on of american cheese because the cheese melted in the center and was ooey gooey delish when you bit into it. Scrumdiddlyumptious.

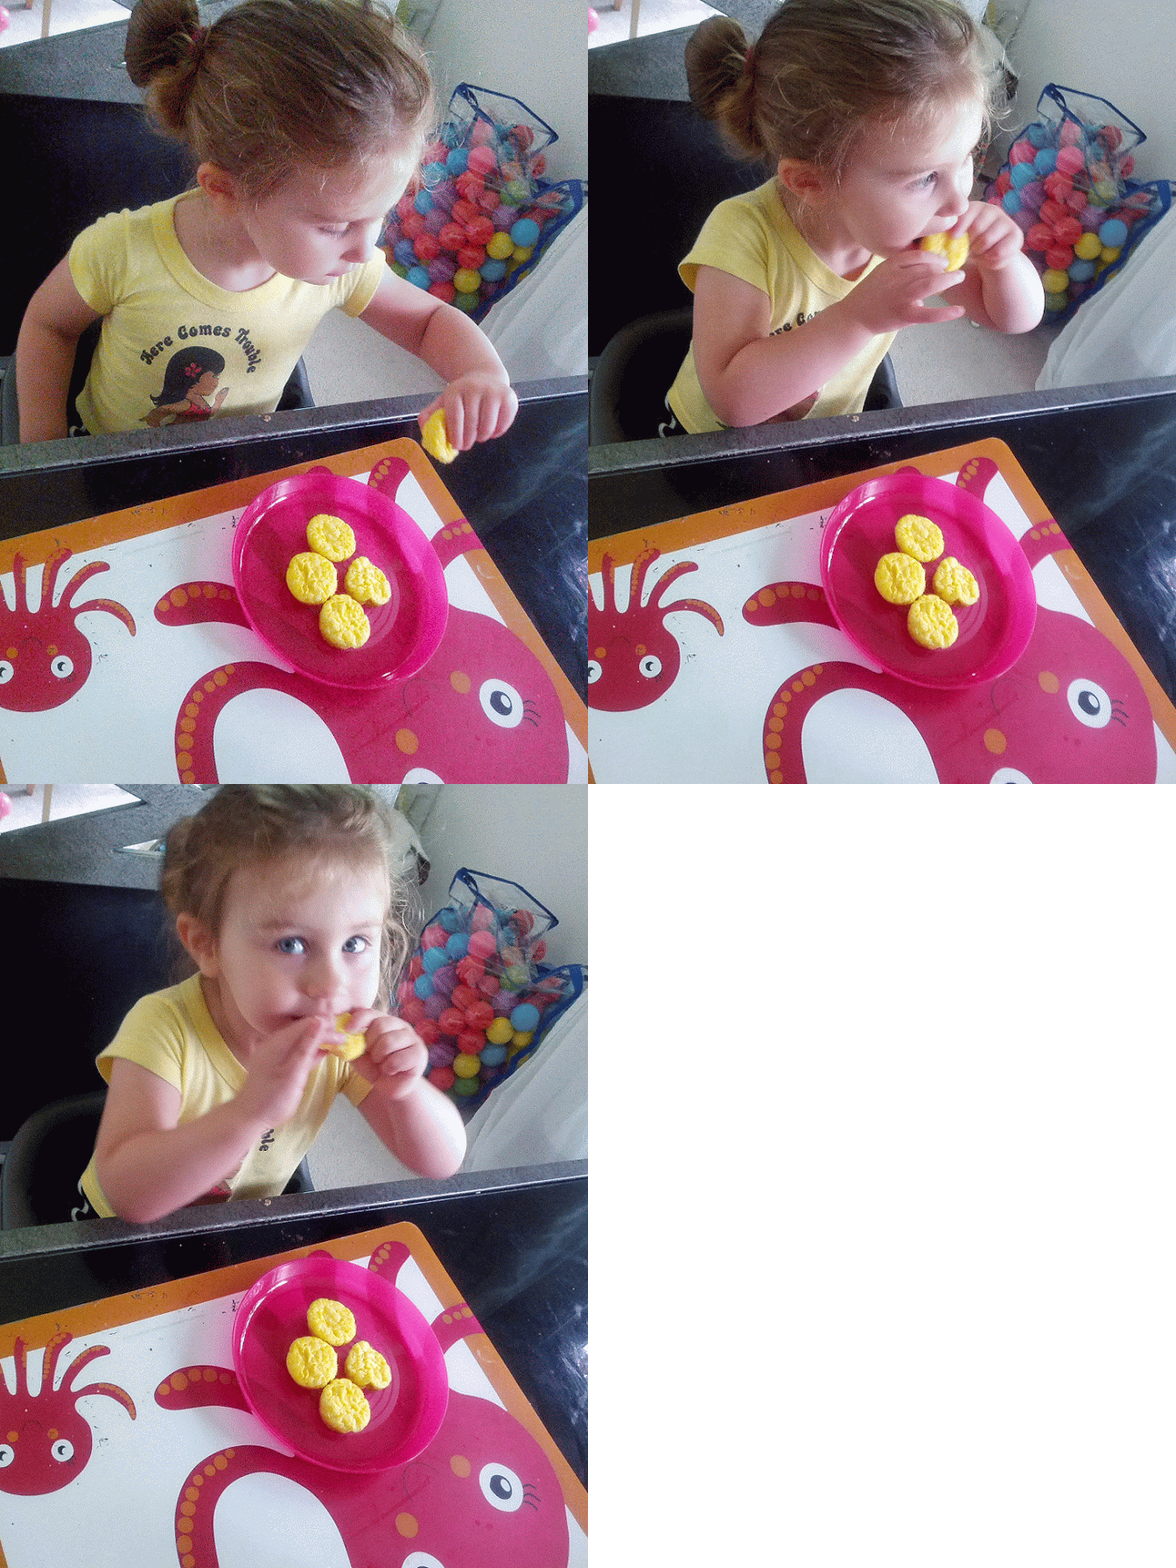
Lelia sprinkling cheddar cheese on egg mini muffins

Lelia eating cheesy egg mini muffins yum

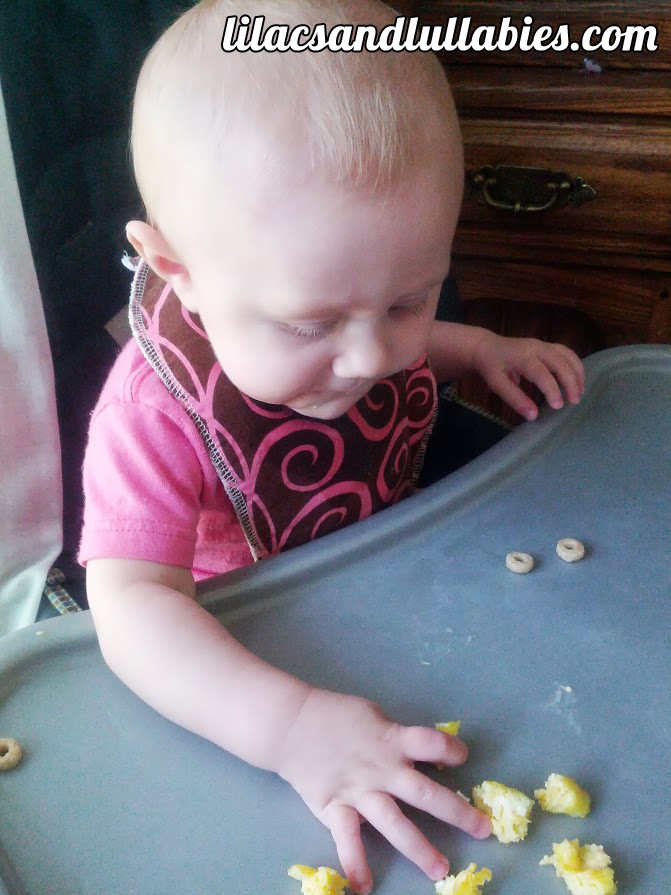
Aerilyn eating her egg and cheese mini muffins

Mommy Vs. The Mommy Pouch (or Diastasis Recti)

I used to have a pretty fit tummy. A tummy I was proud to bare because I worked so hard for it…jogging 4-5 days a week with 3-4 days a week of core work. I never had a six pack but I had a little waist and a firm tummy so I could pull on a bikini and feel good about it. Two little girls later I am now “blessed” with the mommy pouch. The little round kangaroo pouch on your belly that just has no interest in leaving even thought the baby was evicted 9 months ago. If you are a momma you probably know exactly what I am talking about!

Well I am going on a beach vacation late September to the beautiful oceanfront Topsail Island, NC and I am declaring war on this deviant pouch. I gained 45 pounds during pregnancy with my first daughter, Lelia and then lost all but 10 of those pounds before I got pregnant again with my second daughter Aerilyn. I was much better the second time around with watching my calories and trying to stay active to keep the weight gain to a minimum since I had already started off 10 pounds heavier and was successful, only gaining about 35 pounds this time around with my peak weight being 190lb at delivery.

Armed with my fitbit and using myfitnesspal.com (to count calories) I have spent the past 9 months dedicated to getting enough steps in every day to burn more calories than I was taking in. This got me almost back down to pre baby 1 & 2 weight – now weighing in around 147. (I was 145lb when I first became pregnant with my first). Despite all this weight loss I still have this little pouch so I am determined to be rid of it. I figured I could do some planks and sit ups and crunches and be rid of it but unfortunately it just isn’t that easy. The culprit? Diastasis Recti.

Never heard of it? Me either until I was pregnant with my second. Apparently it is part of the reason why you show much more quickly the second time around. Basically it is a separation of the ab muscles right down the center of the core area where the muscles have become disconnected and the only thing that stands between them is a really thin (think saran wrap!) layer of connective tissue. If you find that you have diastasis recti (There’ s a test for it that involves lying on the ground and lifting your shoulders just enough to feel for a separation near your belly button.) all of your typical ab work can actually cause more harm than good because it can cause the muscles to separate further. I didn’t realize this until recently and had been doing planks and -trying- unsuccessfully to do sit ups and crunches. I was thinking heyyy just give it time and your lame ass will be able to do a sit up again. 9 months later and still unsuccessful I knew something was up.

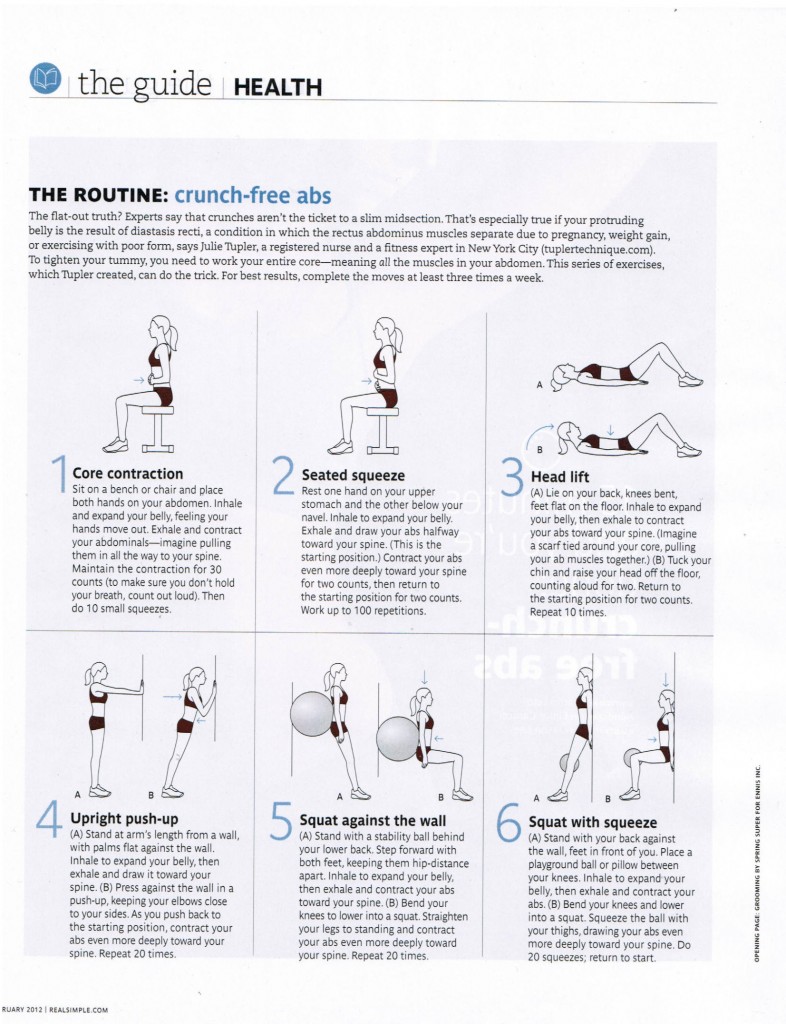
Did some research and I seem to have a 3/4″ to 1″ separation going on at the moment which honestly isn’t too bad considering I have heard some women can be separated 4 inches or more but it has severely weakened my core and I think it is contributing to the lower back pain that has come on since having Aerilyn. Researching I found a handful of exercises that can be done instead of the usual ab stuff you hear about to rejoin the muscles and rebuild the core so that regular ab work will be possible again. The exercises are referred to as the “Tupler Technique” and are basically really basic exercises where you pull in your ab muscles and either release or pulse while sitting, standing or lying down. You are supposed to do them I think 2-3 times a day for a minimum of 3 weeks to see improvement. I found a pretty helpful graphic explaining the exercises and Tupler Technique on the site realsimple.com and will share it below for any of you also dealing with a mommy pouch and may have ab separation.

So far I have only found time and remembered to do the exercises about once a day for the past few days but hopefully  if I  remain persistent I can work on getting those old abs back so I can feel good both in AND out of my clothes again. Keeping my fingers crossed!

Tupler Technique for healing ab separation after pregnancy (diastastis recti)

Are any of you momma’s dealing with the dreaded mommy pouch or have you in the past? Did traditional ab work help solve the problem for you? Have you tried the Tupler technique with any success? Would love to hear from you guys!

Just a little intro..and welcome!

This is my new little place to call home. You may know me as the chica from enrapture.net but I have since outgrown the site I bought as a teenager.  A husband and two little girls later I decided I needed a fresh new start (and a new domain to be excited about!)

A little about me? I’m a 30 year old work at home mom in the Rochester New York Area. I married my husband 4 years ago on July 4th, 2009 and since have had 2 beautiful little girls (Lelia – 11/29/10 + Aerilyn – 11/3/12). I own my own design business that I run from my home office designing stationery and paper products for weddings, showers, birthday’s and special events (weddingsnwhimsy.com).

I am an animal lover and have a 6 year old Maltese (dog) named Zoe, a 5 year old Turkish Van (Cat) named Totoro, and a 3 year old rabbit named Peko. Someday I would love to have some chickens to gather fresh eggs from and maybe even a goat. (I don’t know why – I’ve always wanted a goat. Maybe this is part of my reason why?)

In my free time (what free time?!) I enjoy spending time with my husband and girls, reading, baking, cooking, video games…etc.etc.. I’m sure you’ll get to hear about all of these things and more. Oh. And Pinterest. Love me some Pinterest.

Well that’s the short of it..I hope you will return to learn more about me and my life, get inspiration, diy ideas, recipes, product reviews and a rant (or two) as well. You just never know. (Heck, most days I don’t even know.) I’m just happy to have a new place to call my own where I can share my thoughts, feelings and ideas again. Weeee.

xoxo Lilly LilacsandLullabies.com